Cleaning the ink cartridge in your Brother printer is crucial to keep it working well and make it last longer. Doing this regularly ensures your printer produces top-notch printouts and prevents ink problems like clogged nozzles or blurry prints. This article explains how to clean an ink cartridge in a Brother printer, organised into the following sections:
How to Clean an Ink Cartridge in a Brother Printer
Before you begin cleaning, make sure you have the right stuff on hand. You’ll need a lint-free cloth, distilled water, and isopropyl alcohol. Make sure the cloth is clean without any bits on it because even tiny particles can cause problems in the print head or nozzles and lead to ink issues.
Choose distilled water instead of tap water because it doesn’t have impurities that can harm the ink cartridge. Use high-purity isopropyl alcohol to clean the ink cartridge contacts, ensuring it won’t damage them.
1- Turn off the printer and remove the ink cartridge
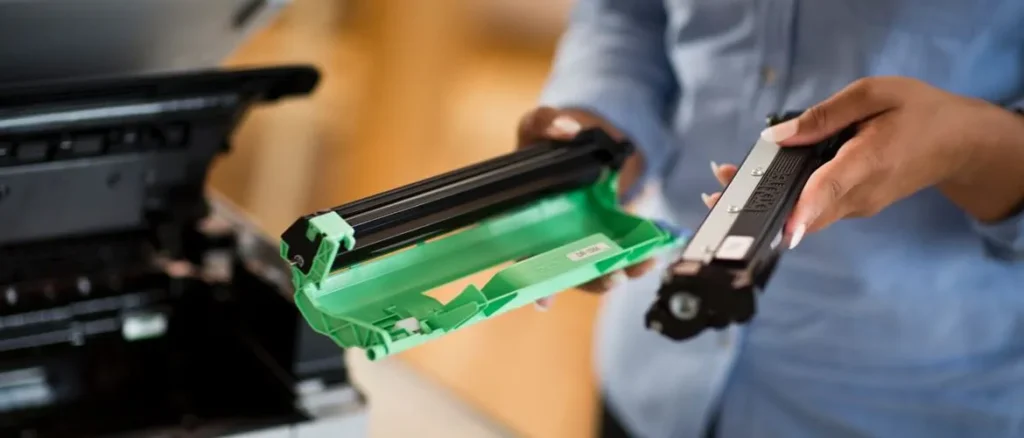
Before you clean the ink cartridge, turn off the printer and unplug it to stay safe from electrical hazards. Open the printer cover to get to the ink cartridge area and take out the ink cartridge. Check your printer manual for the exact steps on removing the ink cartridge for your Brother printer model.
2- Clean the ink cartridge contacts
The ink cartridge contacts are the metallic strips located at the bottom of the cartridge. Over time, these contacts can become dirty, leading to communication issues between the printer and the ink cartridge.
To clean the contacts, take a lint-free cloth and dip it in distilled water or isopropyl alcohol. Gently wipe the contacts, but don’t use too much force or rub them hard to avoid damaging the contacts or the cartridge’s surface. Make sure the contacts are totally dry before putting the ink cartridge back in.
3- Clean the print head and nozzles
The print head and nozzles are important parts of the ink cartridge that might get clogged with dried ink or debris, causing issues like blurry prints or clogged nozzles. To clean them, use a lint-free cloth dipped in distilled water or is opropyl alcohol. Gently wipe the print head and nozzles.
Be gentle and avoid pressing too hard or touching the print head or nozzles with your fingers to prevent damage. If they’re really clogged, think about using a special cleaning solution suggested by Brother or reach out to a technician for help.
4- Reinstall the ink cartridge and test the printer
Once you’ve cleaned the ink cartridge, make sure the contacts are completely dry before putting the cartridge back into the printer. Check the printer manual for the exact steps on installing the ink cartridge for your Brother printer model.
After installing the ink cartridge, switch on the printer and test it by printing a test page or document. If the print quality is still not good, think about doing the cleaning process again or get in touch with a technician for help.
Additional Tips to Consider When Cleaning Ink Cartridge in Brother Printer:
- Make sure to use a lint-free cloth when cleaning the ink cartridge. Other types of cloths may leave fibres on the cartridge’s surface, which can lead to clogs or ink leakage.
- Don’t use tap water to clean the ink cartridge because it might have minerals or impurities that can harm the cartridge’s surface.
- Use propyl alcohol with high purity, preferably 90% or higher, to prevent any damage to the ink cartridge contacts.
- Do not touch the print head or nozzles with your fingers, as this can cause damage and lead to ink-related issues.
- If the ink cartridge is old or expired, consider replacing it with a new one rather than attempting to clean it.
- Follow the printer manual’s instructions when removing and installing the ink cartridge to avoid any damage to the printer.
Beta feature


