


How To Connect Ricoh Printer To WiFi? – For any professional or business, printers are a necessary piece of equipment. There is a printer to suit almost any type of job, including all-in-ones, single-function, color, and monochrome. One of the best print service tools for enterprise information security and lowering capital costs is Ricoh managed print services. In order to ensure that Resource Capacity Management, Queue Management, Helps to Create More Secure Policies, Cost and Money Savings, Reduce Environmental Footprint, and Overall Enterprise Visibility are just a few of the services offered by Ricoh Managed Print Services. Queue Management, Paper Management Helps to Reduce Ideal Time at the Print Delivery. Therefore, if you are also a Ricoh Printer user and wants to learn How To Connect Ricoh Printer To WiFi?, then read along.
 Tech Support Expert will provide a resolute, prompt, and detailed response to any difficulty, including How To Connect Ricoh Printer To WiFi? The company has a reputation for providing consumers with the best, most effective solutions as the leading provider of technical support services in the sector. The organization lead the industry because of its highly skilled technical personnel, illustrious history of achievement, and steadfast dedication. Call 800-742-9005 or send an email to support@techsupportexpert.com if you are having any sort of technical issues and would want to get them resolved as quickly as possible. We are here to assist you by offering the highest caliber of service.
How to Connect Ricoh Printer To WiFi?
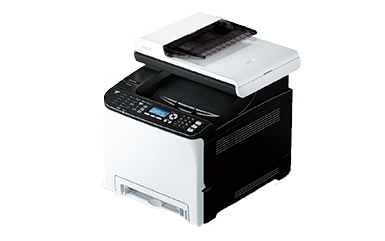
Richo printers is known to provide best-in-class quality prints, excellent end-to-end experience and support. Numerous businesses all around the world depend on Ricoh’s high-quality print technology and exceptional dependability to support intelligent, effective, and long-lasting business workflows. For one simple reason—smart laser technology that consistently produces the highest-quality results regardless of the task—extensive Ricoh’s selection of office printers is a market leader. Furthermore, because Ricoh printers is aware of the needs of the contemporary workplace, its laser printers are just as dependable in terms of security, usability, and productivity as they are in terms of quality. And all these quality are some of the reasons that make Ricoh Printers one of the most demanded printers in India. Therefore, if you are a Ricoh printer user who is experiencing trouble connecting your Ricoh printer to wifi, then let’s explore some of the methods on How to Connect Ricoh Printer To WiFi?
Use the Locked Job option to delay the release of the document until you are in front of the Ricoh printer if you are printing sensitive data on a shared Ricoh printer. To prevent someone else from accidentally retrieving your paper from the printer, you must enter a password before the print job can be finished.
Steps to Connect Ricoh Printer To WiFi in Windows 10/11
- Click the Preferences button after selecting File > Print and the Ricoh printer.
- Change “Job Type” to “Locked Print” (not “Hold Print”) after selecting the Detailed Settings tab and the “Job Setup” icon. then select the “Details” buttons next to it.Change “Job Type” to “Locked Print” (not “Hold Print”) after selecting the Detailed Settings tab and the “Job Setup” icon. then select the “Details” buttons next to it.
- To identify your print job when you go to the Ricoh printer to release it, enter a brief User ID in the “Job Type Details” window. For the “Password” field, insert any string of numbers up to eight digits. After clicking OK, send your print job.
- Go to the Ricoh printer and select “Printer” from the Home menu using the built-in display screen.
- Select the “Print Jobs” tab from the list on the left of the Printer window, then select “Locked Print Job.”
- Search for your print job in the Locked Print Job window using the User ID that you entered in the User ID field earlier. To choose your job from the list, tap it. Click “Print.”
- The password you selected in the previous steps will need to be entered when requested. Using the keypad on the Ricoh, enter the password, and then press “OK.” Are you sure you want to print the following? a notice will appear. Once more tap “Print,” your job will print.
Steps to Connect Ricoh Printer To WiFi in MAC
- If the details are buried in the print dialogue box, click “Show Details.”
- Set “Job Log” as the job type selection option. See the comments at the bottom of this page if the Job Log and other choices are not appearing.
- When you go to the Ricoh printer to release your print job, identify it by entering a brief User ID.
- Locked Print should be selected from the Job Type drop-down menu (not Hold Print).
- Enter a four to eight digit numeric password of your choice. To release the job, you must input this password.
- Go to the Ricoh printer and select “Printer” from the Home menu using the built-in display screen.
- Select “Locked Print Job” from the list of options under the “Print Jobs” tab on the left of the Printer window.
- Search for your print job in the Locked Print Job window using the User ID that you entered in the User ID field earlier. To choose your job from the list, tap it. Click “Print.”
- The password you selected in the previous steps will need to be entered when requested. Using the keypad on the Ricoh, enter the password, and then press “OK.” Are you sure you want to print the following? a notice will appear. When you tap “Print” once more, your job prints.
Note: NEWER MAC OS VERSIONS LACK PRINT JOB OPTIONS
You might need to use the “reset printing system” workaround if “Job Log” and “Printer Features” aren’t listed in the dropdown list. Please be aware that after using this fix, all of your printers must be added again. Navigate to System Preferences > Printers & Scanners to utilise the “reset” solution. Click any printer in the list while holding down the Option key on your keyboard, then select Reset printing system from the menu.
You will need to add printers afresh by following the directions on the Adding Printers on a Mac page because this reset will remove any printers you have installed. All the lost print options ought should now be visible after being added again.
Conclusion
If you want to to Connect Ricoh Printer To WiFi, we advise that you follow these instructions. Follow the mentioned-above if you want to Connect Ricoh Printer To WiFi. To get the greatest results, strictly adhere to the directions for each stage. However, if you feel you will still need help with technology after taking the aforementioned steps, get in touch with our IT specialists. We really hope you enjoy exploring our website and discover the details you were looking for. Contact us at 800-742-9005 or support@techsupportexpert.com if you need more assistance from skilled experts.


