You can use the printer to send and receive faxes, including color faxes. You can schedule faxes to be sent at a later time and set up speed-dials to send faxes quickly and easily to frequently used numbers.
From the printer control panel, you can also set a number of fax options, such as resolution and the contrast between lightness and darkness on the faxes you send.
Before you begin faxing, make sure you have set up the printer correctly for faxing. You might have already done this as part of the initial setup, by using either the control panel or the HP software provided with the printer.
To test fax setup
- Set up the printer for faxing according to your particular home or office setup instructions.
- Make sure the ink cartridges are installed, and that full-size paper is loaded in the input tray before starting the test.
- From the printer control panel, touch (right arrow), and then select Setup.
- Select Tools, and then select Run Fax Test. The printer displays the status of the test on the display and prints a report.
- Review the report.
- If the test passes and you are still having problems faxing, check the fax settings listed in the report to verify the settings are correct. A blank or incorrect fax setting can cause problems faxing.
- If the test fails, review the report for more information on how to fix any problems found.
How to SEND a FAX using HP Officejet 8600 , 8600 plus
[accordion-wrap ]
[accordion title=”Send a standard fax Using Printer control panel” icon=”icon-file” active=”false”]
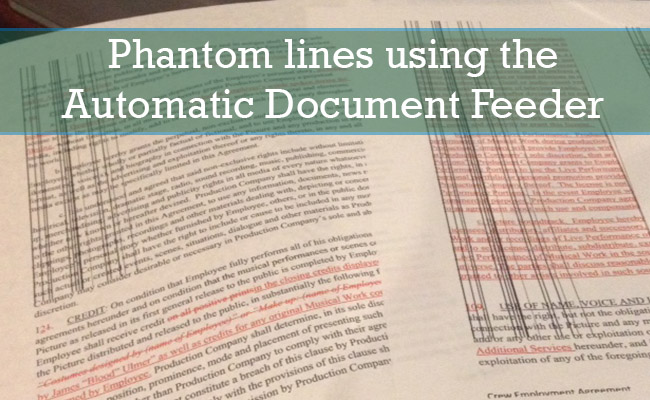
- Load your original print-side down on the right-front corner of the glass or printside up in the ADF.
- Touch Fax.
- Enter the fax number by using the keypad. [ To add a pause in the fax number, Touch * repeatedly until a dash (–) appears on the display. ]
- Touch Start Black or Start Color.
If the printer detects an original loaded in the automatic document feeder (ADF), it sends the document to the number you entered. [ If the recipient reports issues with the quality of the fax you sent, you can try changing the resolution or contrast of your fax. ][/accordion]
[accordion title=”Send a standard fax from the computer” icon=”icon-file” active=”false”]
To use this feature, you must install the printer driver software first.
Windows
- Open the document on your computer that you want to fax.
- On the File menu in your software application, click Print.
- From the Name list, select the printer that has “fax” in the name.
- To change settings (such as selecting to send the document as a black fax or a color fax), click the button that opens the Printer Properties dialog box. Depending on your software application, this button might be called Properties, Options, Printer Setup, Printer, or Preferences.
- After you have changed any settings, click OK.
- Click Print or OK.
- Enter the fax number and other information for the recipient, change any further settings for the fax, and then click Send Fax. The printer begins dialing the fax number and faxing the document.
Mac OS X
- Open the document on your computer that you want to fax.
- From the File menu in your software application, click Print.
- Select the printer that has “(Fax)” in the name.
- Select Fax Information from the pop-up menu. If you cannot find the pop-up menu, try clicking the disclosure triangle next to the Printer selection.
- Enter the fax number and other information in the boxes provided. [ To send a color fax, select Fax Options from the pop-up menu, and then click Color. ]
- Select any other fax options you want, and then click Fax to begin dialing the fax number and faxing the document.
[/accordion]
[accordion title=”Send a fax manually from a phone” icon=”icon-file” active=”false”]
Sending a fax manually allows you to make a phone call and talk with the recipient before you send the fax. This is useful if you want to inform the recipient that you are going to send them a fax before sending it. When you send a fax manually, you can hear the dial tones, telephone prompts, or other sounds through the handset on your
telephone. This makes it easy for you to use a calling card to send your fax.
Depending on how the recipient has their fax machine set up, the recipient might answer the phone, or the fax machine might take the call. If a person answers the phone, you can speak with the recipient before sending the fax. If a fax machine answers the call, you can send the fax directly to the fax machine when you hear the fax tones from the receiving fax machine.
To send a fax manually from an extension phone
- Load your original print-side down on the right-front corner of the glass or printside up in the ADF.
- Touch Fax.
- Dial the number by using the keypad on the phone that is connected to the printer. Do not use the keypad on the control panel of the printer when manually sending a fax. You must use the keypad on your phone to dial the recipient’s number.
- If the recipient answers the telephone, you can engage in a conversation before sending your fax. If a fax machine answers the call, you will hear fax tones from the receiving fax machine. Proceed to the next step to transmit the fax.
- When you are ready to send the fax, touch Start Black or Start Color. If prompted, select Send Fax.
If you were speaking with the recipient before sending the fax, inform the recipient that they should press Start on their fax machine after they hear fax tones.
The telephone line is silent while the fax is transmitting. At this point, you can hang up the telephone. If you want to continue speaking with the recipient, remain on the line until the fax transmission is complete.
[/accordion]
[accordion title=”Send a fax using monitor dialing” icon=”icon-file” active=”false”]
Monitor dialing allows you to dial a number from the printer control panel as you would dial a regular telephone. When you send a fax using monitor dialing, you can hear the dial tones, telephone prompts, or other sounds through the speakers on the printer. This enables you to respond to prompts while dialing, as well as control the pace of your dialing.
If you are using a calling card and do not enter your PIN fast enough, the printer might start sending fax tones too soon and cause your PIN not to be recognized by the calling card service. If this is the case, you can create a speed dial entry to store the PIN for your calling card.
First , Make sure the volume is turned on to hear a dial tone.
- Load your originals.
- Touch Fax, and then touch Start Black or Start Color. If the printer detects an original loaded in the automatic document feeder, you hear a dial tone.
- When you hear the dial tone, enter the number by using the keypad on the printer control panel.
- Follow any prompts that might occur.
If you are using a calling card to send a fax and you have your calling card PIN stored as a speed dial, when prompted to enter your PIN, touch (Speed Dial) to select the speed dial entry where you have your PIN
stored. Your fax is sent when the receiving fax machine answers.
[/accordion]
[accordion title=”Send a fax from memory” icon=”icon-file” active=”false”]
You can scan a black-and-white fax into memory and then send the fax from memory. This feature is useful if the fax number you are trying to reach is busy or temporarily unavailable. The printer scans the originals into memory and sends them once it is able to connect to the receiving fax machine. After the printer scans the pages into memory,
you can immediately remove the originals from the document feeder tray or scanner glass.
You can only send a black-and-white fax from memory.
- Load your originals.
- Touch Fax, and then touch Fax Options or Fax Settings.
- Touch Scan and Fax.
- Enter the fax number by using the keypad, touch (Speed Dial) to select a speed dial, or touch (Call History) to select a previously dialed or received number.
- Touch Start Fax.
The printer scans the originals into memory and sends the fax when the receiving fax machine is available.
[/accordion]
[accordion title=”Schedule a fax to send later” icon=”icon-file” active=”false”]
You can schedule a black-and-white fax to be sent within the next 24 hours. This enables you to send a black-and-white fax late in the evening, when phone lines are not as busy or phone rates are lower, for example. The printer automatically sends your fax at the specified time.
You can only schedule one fax to be sent at a time. You can continue to send faxes normally, however, while a fax is scheduled.
You can only send scheduled faxes in black-and-white.
To schedule a fax from the printer control panel
- Load your originals.
- Touch Fax, and then touch Fax Options or Fax Settings.
- Touch Send Fax Later.
- Enter the send time by using the numeric keypad, touch AM or PM, and then select Done.
- Enter the fax number by using the keypad, touch (Speed Dial) to select a speed dial, or touch (Call History) to select a previously dialed or received number.
- Touch Start Fax.
The printer scans all pages and the scheduled time appears on the display. The fax is sent at the scheduled time.
To cancel a scheduled fax
- Touch the Send Fax Later message on the display.
– OR –
Touch Fax, and then select Fax Options or Fax Settings.
- Touch Cancel Scheduled Fax.
[/accordion]
[accordion title=”Send a fax to multiple recipients” icon=”icon-file” active=”false”]
You can send a fax to multiple recipients at once by grouping individual speed dial entries into group speed dial entries.
- Load your originals.
- Touch Fax, touch (Speed Dial), and then select the recipient group.
- Touch Start Black.
If the printer detects an original loaded in the automatic document feeder, it sends the document to each number in the group speed dial entry.
You can only use group speed dial entries to send faxes in black and white, because of memory limitations. The printer scans the fax into memory then dials the first number. When a connection is made, it sends the fax and dials the next number. If a number is busy or not answering, the printer follows the settings for Busy Redial and No Answer Redial. If a connection cannot be made, the next number is dialed and an error report is generated.
[/accordion]
[accordion title=”Send a fax in Error Correction Mode” icon=”icon-file” active=”false”]
Error Correction Mode (ECM) prevents loss of data due to poor phone lines by detecting errors that occur during transmission and automatically requesting retransmission of the erroneous portion. Phone charges are unaffected, or might even be reduced, on good phone lines. On poor phone lines, ECM increases sending time and phone charges, but sends the data much more reliably. The default setting is On.
Turn ECM off only if it increases phone charges substantially, and if you can accept poorer quality in exchange for reduced charges. Before turning the ECM setting off, consider the following. If you turn ECM off:
- The quality and transmission speed of faxes you send and receive are affected.
- The Fax Speed is automatically set to Medium.
- You can no longer send or receive faxes in color.
To change the ECM setting from the control panel
- From the Home screen, touch (right arrow), and then select Setup.
- Touch Fax Setup and then select Advanced Fax Setup.
- Select Error Correction Mode.
- Select On or Off.
[/accordion]
[/accordion-wrap]